
Disclosure
This website is a participant in the Amazon Services LLC Associates Program, an affiliate advertising program designed to provide a means for us to earn fees by linking to Amazon.com and affiliated sites.
If your power tool charger red but not charging, the light usually signals a fault—not a full battery. This common issue often stems from bad contacts, a dead battery, or a failing charger. This complete guide reveals the causes and fixes.
You’ll learn how to diagnose red light charger problems, test each component safely, and apply proven methods to restore charging. Expert tips inside will help you avoid costly replacements. Keep reading to get your tools running again.
Key Takeaways
- Steady red light means a fault—blinking red often means overheating or a bad cell.
- Dirty contacts and defective batteries cause most charging failures.
- Test battery, charger, and outlet separately to isolate the fault.
- Replace swollen or hot batteries immediately—never force a charge.
- Match charger voltage and brand to protect tool and battery life.
Best Chargers and Batteries for Fixing Power Tool Charging Problems
Makita DC18RC 18V LXT Rapid Optimum Charger — Best Overall Choice
The Makita DC18RC is the recommended pick for diagnosing charge faults. Its built-in CPU and diagnostic indicators distinguish battery defects from charger errors. The 45-minute rapid charge and forced-air cooling suit heavy workshop use. Ideal for Makita 18V LXT owners wanting reliable, informative charging.

DeWalt DCB115 12V/20V MAX Charger — Best Diagnostic Option
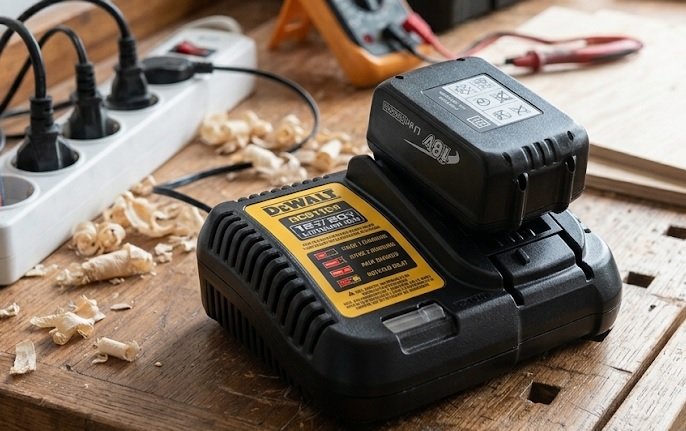
The DeWalt DCB115 is a strong second option with clear LED diagnostics that flag hot or defective packs. Its compact design and 4-amp output deliver consistent charges across 12V and 20V MAX batteries. Best for DeWalt users who want quick fault identification before replacing parts.
Ryobi 40V OP406A 6-Port Supercharger — Best Multi-Battery Solution
The Ryobi OP406A is ideal for testing several packs at once. Its six independent ports show individual charge status, helping isolate a single bad battery. The sequential charging protects circuits and saves wall space. Perfect for large tool collections and shared workshops.

Common Reasons Your Power Tool Charger Shows Red but Won’t Charge
A steady or blinking red light is the charger’s way of reporting a fault. Most failures trace back to four culprits: dirty contacts, a worn battery, a defective charger, or a power supply issue.
1. Dirty or Corroded Battery Contacts
Dust, sawdust, and oxidation block current flow between the battery and charger terminals.
- Symptoms: Red light appears instantly, battery stays cool.
- Fix: Clean terminals with isopropyl alcohol and a soft brush.
2. Battery Cell Failure or Deep Discharge
Lithium-ion packs shut down when voltage drops too low or a cell dies. The charger reads this as a fault and refuses to charge.
- Symptoms: Battery won’t hold charge in the tool either.
- Fix: Test voltage with a multimeter; replace packs below minimum voltage.
3. Faulty Charger or Power Supply Problems
Internal charger faults or a weak outlet can trigger the red light. Try a different outlet and inspect the charger’s pins and cord for damage.
Quick Diagnosis Table
| Symptom | Likely Cause |
|---|---|
| Instant red light | Dirty contacts |
| Blinking red | Overheating or bad cell |
| No light at all | Power or charger fault |
How to Fix a Power Tool Charger Red Light Issue: Step-by-Step
Work through these steps in order to isolate the fault safely. Stop immediately if a battery feels hot, swollen, or smells burnt.
Step 1: Clean and Inspect the Contacts
Unplug the charger before touching any terminals. Remove dust and corrosion, then check for bent or recessed pins.
- Use: Isopropyl alcohol, cotton swab, soft brush.
- Check: Both battery and charger terminals for dark spots or debris.
Step 2: Test the Battery and Charger Separately
Swap the battery into a known working charger, then test a good battery in the suspect charger. The result pinpoints the faulty component fast.
- Insert a healthy battery into the suspect charger.
- Insert the suspect battery into a healthy charger.
- Note which combination fails.
Step 3: Reset the Charger and Battery
Many chargers lock out after a fault. Unplug the charger for 60 seconds, remove the battery, then reconnect and retry. Some packs also reset after cooling for 30 minutes.
Step 4: Check Temperature and Environment
Chargers refuse to charge hot or cold packs. Let batteries reach room temperature before charging. Avoid garages below 32°F or above 104°F.
Key Takeaways
- Clean contacts first—it solves most red light faults.
- Swap-test battery and charger to find the culprit.
- Reset by unplugging for 60 seconds.
- Never charge hot, cold, or swollen batteries.
When to Repair, Replace, or Recycle Your Charger and Battery
Not every red light fault is fixable at home. Knowing when to stop saves money and prevents safety hazards.
Signs the Battery Is Beyond Saving
Lithium-ion packs degrade permanently after repeated deep discharges. Certain warning signs mean replacement, not repair.
- Swollen casing or bulging cells—recycle immediately.
- Hissing, leaking, or a burnt smell—do not charge.
- Voltage below 10V on an 18V pack after a full charge attempt.
Signs the Charger Has Failed
A charger that stays red with a known-good battery is usually defective. Internal fuses and circuit boards are rarely worth repairing.
- No light on any outlet with any battery.
- Buzzing or burning smell during charging.
- Physical damage to the cord, plug, or housing.
Cost Comparison: Repair vs. Replace
| Option | Typical Cost | Best For |
|---|---|---|
| Clean contacts | Free | Minor faults |
| New battery | $40–$120 | Dead or swollen packs |
| New charger | $30–$90 | Defective chargers |
Safe Disposal and Recycling
Never bin lithium-ion batteries with household trash. Take them to Home Depot, Lowe’s, or a local hazardous waste center for free recycling.
Key Takeaways
- Swollen, leaking, or hot batteries must be recycled—never charged.
- Chargers with no light or burn smells are dead; replace them.
- New batteries cost $40–$120; chargers $30–$90.
- Recycle lithium-ion packs at major hardware stores for free.
Preventing Future Power Tool Charger Red Light Problems
Good charging habits extend battery life and stop red light faults before they start. Small changes make a big difference over time.
Follow Proper Charging Habits
Lithium-ion packs last longest when kept between 20% and 80% charge. Avoid draining to zero or leaving packs on the charger for days.
- Charge at room temperature—never in freezing garages.
- Remove packs once the green light appears.
- Store at 50% charge for long breaks.
Keep Chargers and Batteries Clean
Dust and metal shavings cause shorts and poor contact. Wipe terminals monthly with a dry cloth and store gear in a clean, dry case.
Match Brands and Voltage Correctly
Mixing brands or voltages can trigger fault codes or damage cells. Always use the original charger designed for your battery platform.
- Never force a battery into a mismatched charger.
- Check voltage ratings—18V chargers for 18V packs only.
- Use OEM or certified replacements, not cheap knockoffs.
Store Gear in the Right Environment
Extreme heat, moisture, and dust shorten charger life. Keep tools in a dry spot between 50°F and 80°F with low humidity.
Key Takeaways
- Keep batteries between 20% and 80% charge.
- Clean terminals monthly to prevent shorts.
- Match charger brand and voltage exactly.
- Store gear dry at 50°F–80°F.
Brand-Specific Charger Red Light Codes Explained
Major brands use different light patterns to signal faults. Knowing your charger’s code speeds up diagnosis dramatically.
DeWalt, Makita, and Milwaukee Light Signals
Each manufacturer assigns unique meanings to steady and blinking red lights.
- DeWalt DCB115: Blinking red means a hot or defective pack; steady red means charging.
- Makita DC18RC: Blinking red signals a battery problem; steady red indicates active charging.
- Milwaukee M12/M18: Rapid red flash means a bad cell or wrong voltage.
Ryobi, Bosch, and Craftsman Indicators
These brands often combine red and green lights to report status.
- Ryobi: Red light with no green means a defective battery or charger.
- Bosch: Blinking red indicates temperature fault—let the pack cool.
- Craftsman: Solid red means charging; flashing red means battery error.
Quick Reference Table
| Brand | Red Light Meaning |
|---|---|
| DeWalt | Blinking = fault; steady = charging |
| Makita | Blinking = battery issue |
| Milwaukee | Rapid flash = bad cell |
| Ryobi | Red only = defective part |
Always check your manual—codes vary by model year. When in doubt, contact the brand’s support line for confirmation.
Key Takeaways
- Blinking red usually means a fault; steady red means charging.
- Codes differ by brand—check your manual.
- Rapid flashing on Milwaukee signals a bad cell.
- Contact brand support when codes are unclear.
Safety Warnings and Common Diagnostic Mistakes to Avoid
Charging faults can turn dangerous fast. Avoiding a few common errors protects your tools, your workshop, and yourself.
Never Ignore These Warning Signs
Some symptoms demand you stop charging immediately and unplug everything.
- Swollen or bulging battery casings.
- Hissing, popping, or crackling sounds.
- Burnt smells or visible smoke.
- Extreme heat from the pack or charger.
Mistakes That Make Things Worse
DIY shortcuts often damage batteries or void warranties. Avoid these frequent errors.
- Forcing a dead battery to charge repeatedly—this stresses cells.
- Using mismatched chargers from other brands or voltages.
- Bypassing safety circuits or “jump-starting” packs.
- Charging on flammable surfaces like paper or carpet.
Safe Charging Practices
Simple habits reduce risk and extend equipment life.
- Charge on concrete or a metal tray, never fabric.
- Stay nearby during the first 30 minutes of charging.
- Unplug chargers when not in use.
- Keep a Class B fire extinguisher in the workshop.
Key Takeaways
- Stop charging at any sign of swelling, heat, or smoke.
- Never force-charge dead packs or bypass safety circuits.
- Charge on non-flammable surfaces only.
- Keep a fire extinguisher nearby for safety.
Tools and Tests for Diagnosing a Power Tool Charger Red Light
Basic diagnostic tools turn guesswork into a clear answer. A few inexpensive items let you test every component in minutes.
Essential Diagnostic Tools
You don’t need a full electronics lab—just a handful of affordable tools.
- Digital multimeter: Measures battery voltage and charger output.
- Isopropyl alcohol and swabs: Clean corroded terminals.
- Known-good battery or charger: Reference for swap testing.
- Non-contact thermometer: Detects overheating packs.
How to Test Battery Voltage
Voltage readings reveal whether a pack is dead, healthy, or deeply discharged.
- Set the multimeter to DC voltage.
- Touch the probes to the battery’s positive and negative terminals.
- Compare the reading to the pack’s rated voltage.
- Replace packs reading below 80% of rated voltage.
Reading Voltage Results
| 18V Pack Reading | Status |
|---|---|
| 18V–20V | Healthy |
| 14V–17V | Discharged—recharge |
| Below 10V | Dead—replace |
If voltage reads normal but the charger still shows red, the charger itself is likely faulty. Swap-test to confirm before buying a replacement.
Key Takeaways
- A multimeter is the fastest way to test battery health.
- Replace packs reading below 10V on an 18V system.
- Swap-test to confirm whether battery or charger failed.
- Normal voltage with a red light points to a bad charger.
Conclusion: Fixing Your Power Tool Charger Red Light Problem
A power tool charger red but not charging usually means dirty contacts, a worn battery, or a faulty charger. Cleaning terminals and swap-testing components solves most cases fast.
Always prioritize safety—recycle swollen or hot batteries immediately. Never force a charge on a damaged pack.
Grab your multimeter and run the tests above today. Most red light faults are fixable in minutes.
With these proven methods, you’ll keep your tools charged and your projects moving.
Frequently Asked Questions About Power Tool Charger Red Light Issues
Why is my power tool charger showing red but not charging?
A steady or blinking red light typically signals a fault, not active charging. Common causes include dirty battery contacts, a worn or deeply discharged cell, or a defective charger.
Start by cleaning the terminals with isopropyl alcohol. Then swap-test the battery and charger separately to pinpoint which component has failed.
What does a blinking red light on a battery charger mean?
Blinking red usually indicates a battery fault, overheating, or a bad cell. Many chargers flash red when a pack is too hot or cold to charge safely.
Let the battery cool to room temperature for 30 minutes, then retry. If the blinking continues with a known-good pack, the charger itself may need replacement.
How do I know if my battery or charger is faulty?
The fastest method is a swap test. Insert a healthy battery into the suspect charger, then test the suspect battery in a working charger.
Whichever combination fails reveals the faulty part. A multimeter reading below 10V on an 18V pack confirms the battery is dead.
Can I fix a power tool battery that won’t charge?
Sometimes. Deeply discharged packs occasionally recover after a reset—unplug the charger for 60 seconds and retry. Cleaning corroded contacts also restores many batteries.
However, swollen, leaking, or hot packs cannot be fixed. Recycle these immediately at a hazardous waste center or hardware store.
How long should a power tool battery take to charge?
Most 18V lithium-ion packs charge in 30 to 60 minutes with a rapid charger. Compact batteries finish faster; larger 5.0Ah packs take longer.
If your battery sits on the charger for hours without a green light, the pack or charger has likely failed. Test both components.
Is it safe to use a charger from a different brand?
No. Mismatched chargers can damage cells, void warranties, and create fire hazards. Voltage and terminal designs vary between brands.
Always use the original charger designed for your battery platform. Certified OEM replacements are the safest option.
What should I do if my battery gets hot while charging?
Unplug the charger immediately and move the battery to a non-flammable surface. Heat signals an internal fault or cell failure.
Let it cool completely, then inspect for swelling or damage. If either is present, recycle the pack—never attempt another charge.
How can I prevent charger red light problems in the future?
Keep batteries between 20% and 80% charged, clean terminals monthly, and store gear in a dry spot between 50°F and 80°F.
Always match charger brand and voltage, and remove packs once the green light appears. These habits dramatically extend battery life.