
Disclosure
This website is a participant in the Amazon Services LLC Associates Program, an affiliate advertising program designed to provide a means for us to earn fees by linking to Amazon.com and affiliated sites.
A hoverboard battery at full charge typically reads 42V for 36V models and 58.8V for 48V models. Half charge sits near 36V or 50V, while empty means 30V or 42V. Knowing these numbers protects your ride and extends battery life.
This complete guide breaks down hoverboard battery voltage by charge level, chemistry, and model. You’ll also get expert tips on reading voltage sag, spotting a failing pack, and charging safely. Keep reading to master your board’s power system.
Key Takeaways
- 42V means fully charged on a 36V hoverboard; 58.8V on a 48V board.
- Half charge reads roughly 36V (36V models) or 50V (48V models).
- 30V and 42V are empty for 36V and 48V packs respectively.
- Voltage sag under load is normal; resting voltage is the true reading.
- Below 30V or 42V, stop riding and recharge immediately.
Best Hoverboard Voltage Testers and Battery Monitors for Accurate Readings
1. Oasser Voltage Meter V7 – Best Overall Choice
The Oasser V7 is a digital multimeter with 0.1V accuracy, making it the recommended tool for checking hoverboard battery voltage. It reads DC voltages up to 100V, covers both 36V and 48V packs, and includes a backlit display. Ideal for riders who want quick, reliable readings at home.
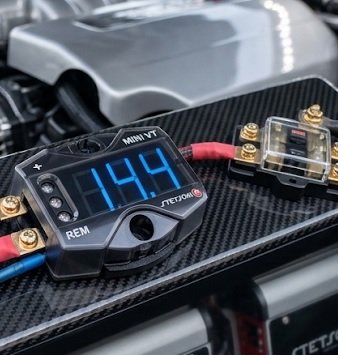
2. DROK Digital Voltage Monitor 200164 – Best Permanent Monitor
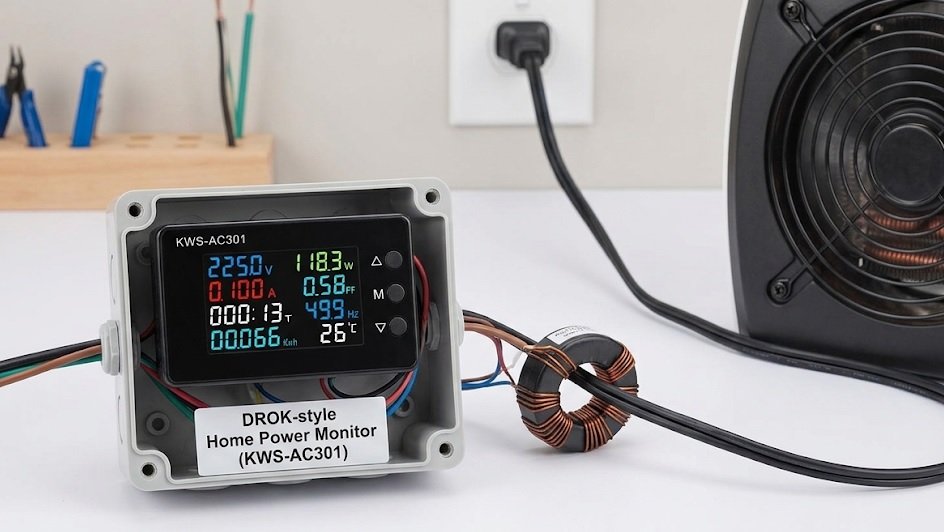
The DROK 200164 is a mini DC voltmeter (0-100V) you can wire directly into your hoverboard’s battery line. It shows live voltage while you ride, so you spot sag and low-charge warnings instantly. Best option for DIY enthusiasts and frequent riders.
3. Fluke 115 Field Service Multimeter – Best Professional Option
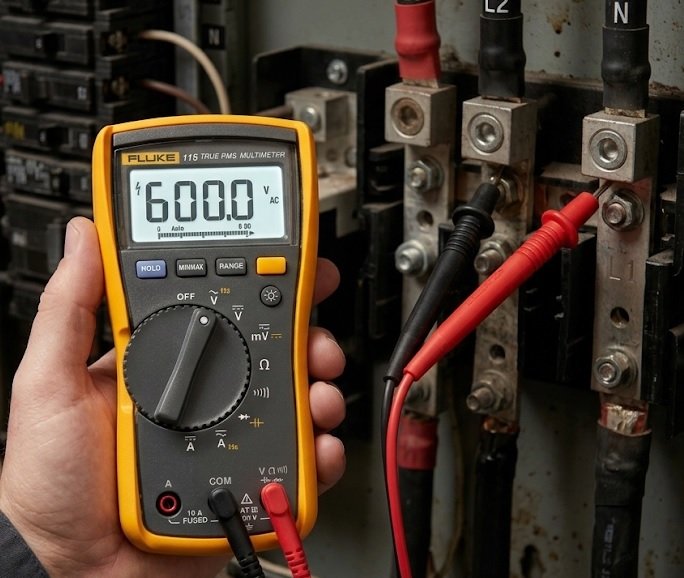
The Fluke 115 delivers True RMS accuracy and CAT III safety rating, ideal for testing hoverboard chargers, BMS boards, and individual cell groups. It costs more, but its precision and durability make it the best choice for repair shops and serious battery diagnostics.
Hoverboard Battery Voltage Chart by Charge Level and Model
A hoverboard battery voltage chart gives you an instant snapshot of charge status. The numbers differ between 36V and 48V systems, so always confirm your model first.
36V Hoverboard Voltage Range (10S Li-Ion)
Most classic hoverboards run on 36V lithium-ion packs with ten cells in series. Voltage drops steadily as you ride.
- 100% charged: 42.0V (resting)
- 75% charged: 39.0V
- 50% charged: 36.0V
- 25% charged: 33.0V
- Empty: 30.0V (cutoff)
48V Hoverboard Voltage Range (13S Li-Ion)
Performance models use 48V packs with thirteen series cells. The same percentage logic applies, just at higher numbers.
- 100% charged: 54.6V (resting)
- 50% charged: 48.0V
- Empty: 42.0V (cutoff)
Quick Comparison Table
| Charge Level | 36V Model | 48V Model |
|---|---|---|
| Full | 42.0V | 54.6V |
| Half | 36.0V | 48.0V |
| Empty | 30.0V | 42.0V |
Quick Rule:
- Divide full-charge voltage by 1.4 to estimate empty voltage.
Next, let’s look at why your readings may not match this chart exactly.
How to Measure Hoverboard Battery Voltage Safely and Accurately
Getting a true reading takes more than touching probes to terminals. Follow these proven methods to avoid false numbers and damaged packs.
Step-by-Step Voltage Testing Process
- Charge fully, then rest 30 minutes. Charger voltage inflates readings.
- Power off the hoverboard. Active boards draw current and skew results.
- Access the battery terminals. Remove the footpad or casing carefully.
- Set your multimeter to DC volts. Choose the 200V range for safety.
- Touch red to positive, black to negative. Read the resting voltage.
Why Voltage Sag Makes Readings Misleading
Voltage sag is the temporary drop that happens when your hoverboard draws heavy current. A pack reading 36.0V at rest may dip to 31V during acceleration.
- Resting voltage: measured with the board off — the accurate figure
- Loaded voltage: measured while riding — always lower
- Recovery: voltage rebounds within seconds after you stop
Signs Your Battery Voltage Is Abnormal
Some readings point to a failing pack rather than normal discharge. Watch for these warning signs.
- Full charge below 41V (36V pack): weak or dead cell group
- Rapid drop under load: high internal resistance
- Uneven cell voltages: BMS balance failure
Pro Tip:
- Always trust resting voltage over loaded voltage when judging charge level.
Now let’s connect these numbers to real-world range and charging behavior.
Hoverboard Battery Voltage vs Range, Charging, and Lifespan
Voltage tells you more than charge level — it predicts range, charging time, and remaining pack life. Here’s how the numbers translate into real riding.
How Voltage Relates to Riding Range
Range scales with usable voltage, not just amp-hours. A pack running from 42V to 30V delivers roughly 12V of usable energy.
- 42V to 39V: full power, longest range per mile
- 39V to 33V: steady performance, slight speed loss
- 33V to 30V: reduced torque, tilt-back warnings appear
Charging Voltage and Cutoff Behavior
Your charger outputs a higher voltage than the pack’s resting maximum. That’s normal and necessary for a full charge.
| Pack | Charger Output | Resting Full |
|---|---|---|
| 36V | 42V | 42.0V |
| 48V | 54.6V | 54.6V |
The BMS cuts power near 30V or 42V to prevent cell damage. Riding past cutoff risks permanent capacity loss.
Voltage and Long-Term Battery Health
Where you store your hoverboard matters as much as how you ride it. Lithium cells age fastest at extreme voltages.
- Store at 50-60%: roughly 36V or 48V resting
- Avoid full storage: stresses cells over weeks
- Never store empty: causes irreversible sulfation
Remember:
- Voltage is your best single indicator of both charge and battery health.
With these fundamentals covered, let’s troubleshoot the most common voltage problems riders face.
Troubleshooting Common Hoverboard Battery Voltage Problems
Strange voltage readings usually point to one of a few known issues. Work through these fixes before replacing your battery.
Hoverboard Won’t Charge or Stops Early
A charger that never reaches full voltage often signals a wiring or BMS fault. Check these causes in order.
- Test the charger output with a multimeter — it should match 42V or 54.6V.
- Inspect the charge port for bent pins or corrosion.
- Check the BMS for a tripped protection circuit.
- Measure individual cell groups for a weak or dead section.
Voltage Drops Fast After Full Charge
If your board falls from 42V to 36V within minutes, the pack likely has high internal resistance. Aging cells or an unbalanced group are the usual culprits.
- Balance charge repeatedly: leave it plugged in a few extra hours
- Test under light load: compare resting vs loaded voltage
- Replace the pack if sag exceeds 4-5V
Board Shows Full Charge but Won’t Move
This often means the BMS has entered protection mode. The pack may read normal voltage while output stays cut off.
- Reset the BMS: unplug and reconnect the battery
- Check the fuse: a blown fuse blocks all output
- Inspect connectors: loose XT60 or bullet plugs cause dropouts
Diagnostic Rule:
- Normal resting voltage plus no output equals a BMS or fuse problem, not a dead battery.
Finally, let’s cover the safety practices every hoverboard owner should follow.
Hoverboard Battery Voltage Safety and Maintenance Best Practices
Lithium packs store serious energy, and careless handling causes fires. These proven habits keep your voltage healthy and your rides safe.
Safe Charging Voltage Habits
Most hoverboard fires start during charging. Follow these rules every single time.
- Use the original charger: mismatched voltage overcharges cells
- Charge on a hard surface: never on carpet or bedding
- Unplug at full charge: don’t leave it overnight for days
- Monitor temperature: a hot pack means stop immediately
Storage Voltage for Long Battery Life
If you won’t ride for weeks, storage voltage matters more than charge level. Aim for roughly 50-60% capacity before putting it away.
| Pack | Ideal Storage Voltage |
|---|---|
| 36V | 36V – 38V |
| 48V | 48V – 50V |
Recharge to storage level every two to three months. This prevents deep discharge damage.
Warning Signs of a Failing Battery Pack
Certain voltage behaviors mean it’s time to replace the pack, not repair it.
- Swelling or bulging: stop use immediately
- Full charge under 41V (36V pack): dead cell group
- Sudden voltage collapse: internal short risk
- Burning smell or heat: evacuate and ventilate
Safety First:
- Never charge a swollen, hot, or damaged pack — replace it instead.
Understanding voltage is only half the story; knowing when to stop riding protects both your board and your home.
Hoverboard Battery Voltage Specifications by Popular Model
Not every hoverboard uses the same voltage system. This reference table shows what to expect from common models and categories.
36V vs 48V Hoverboard Comparison
Voltage determines speed, torque, and hill-climbing ability. Higher voltage means more performance, but also higher cost and weight.
| Spec | 36V Models | 48V Models |
|---|---|---|
| Full charge | 42.0V | 54.6V |
| Top speed | 6-8 mph | 9-12 mph |
| Typical range | 6-10 miles | 10-15 miles |
| Best for | Kids, flat ground | Adults, hills |
Common Hoverboard Models and Their Voltage
Most consumer boards fall into one of two voltage classes. Knowing yours prevents buying the wrong charger or replacement pack.
- Swagtron T580: 36V system, 42V full charge
- Segway Ninebot S: 36V system, 42V full charge
- Hover-1 Titan: 36V system, 42V full charge
- High-performance off-road boards: 48V system, 54.6V full charge
How to Confirm Your Hoverboard’s Voltage
If you’re unsure which class your board belongs to, check these three sources.
- Read the charger label: output voltage reveals the pack type
- Check the battery sticker: usually printed as “36V” or “48V”
- Measure with a multimeter: full charge confirms the class
Quick ID:
- 42V full charge means 36V system; 54.6V means 48V system.
With model specs covered, you now have everything needed to read, test, and maintain your hoverboard battery voltage confidently.
Hoverboard Battery Voltage FAQ: Common Rider Questions Answered
Riders ask the same voltage questions again and again. Here are direct answers to the most frequent ones.
What Voltage Should a Fully Charged Hoverboard Read?
A fully charged 36V hoverboard reads 42.0V at rest. A 48V board reads 54.6V. Readings slightly below these numbers after 30 minutes of rest are normal.
Is 36V the Same as Half Charge on a 36V Hoverboard?
Yes, coincidentally. A 36V system at 50% capacity rests near 36.0V. Don’t confuse the pack’s nominal rating with its live charge state.
Can I Ride at 30V or Below?
No. The BMS cuts power around 30V (36V packs) or 42V (48V packs) to protect the cells. Forcing it lower causes permanent damage.
Why Does My Voltage Drop While Riding?
This is voltage sag, and it’s completely normal. Heavy acceleration, hills, and higher rider weight increase current draw and lower voltage temporarily.
How Accurate Are Built-In Battery Indicators?
Built-in LED bars are rough estimates, not precise gauges. They often show “full” until voltage drops sharply, then plunge quickly.
- LED bars: approximate, voltage-based
- Multimeter: precise, rider-controlled
- Wired monitor: live, continuous readout
Bottom Line:
- Trust a multimeter over built-in indicators for accurate charge readings.
These answers cover the essentials, but a few final expert tips will help you get even more from your battery.
Conclusion: Mastering Hoverboard Battery Voltage Readings
You now know the exact hoverboard battery voltage for full, half, and empty states. A 36V pack reads 42V, 36V, and 30V. A 48V pack reads 54.6V, 48V, and 42V.
Always measure resting voltage, not loaded voltage. It’s the true indicator of charge and pack health.
Grab a multimeter and test your board today. Compare your numbers against the charts above.
With these proven methods, you’ll ride safer and extend your battery’s lifespan.
Frequently Asked Questions about Hoverboard Battery Voltage
What voltage is a hoverboard battery when fully charged?
A fully charged 36V hoverboard battery reads 42.0V at rest. A 48V hoverboard battery reads 54.6V at rest.
Always wait 30 minutes after unplugging the charger before measuring. Charger voltage inflates readings, so immediate numbers look artificially high.
How do I know when my hoverboard battery is half empty?
Half charge sits near 36.0V on a 36V pack and 48.0V on a 48V pack. These are resting voltages measured with the board powered off.
Built-in LED indicators are unreliable at this stage. They often show three or four bars while actual voltage has already dropped below 50%.
What is the lowest voltage a hoverboard should reach?
Never let a 36V pack drop below 30.0V or a 48V pack below 42.0V. The BMS cuts power at these thresholds to protect the cells.
Repeatedly draining below cutoff causes permanent capacity loss. Recharge as soon as voltage approaches the empty mark.
Why does my hoverboard voltage drop while riding?
This is called voltage sag, and it’s completely normal. Acceleration, hills, and heavier riders increase current draw, which temporarily lowers voltage.
Voltage recovers within seconds after you stop. Judge charge level using resting voltage, never loaded voltage.
How can I test my hoverboard battery voltage at home?
Use a digital multimeter set to DC volts on the 200V range. Charge fully, rest 30 minutes, power off, then touch red to positive and black to negative.
Access terminals by removing the footpad or casing. A reading below 41V (36V pack) at full charge indicates a failing cell group.
What is the best way to store a hoverboard battery?
Store packs at 50-60% charge, roughly 36-38V for 36V models and 48-50V for 48V models. Keep them in a cool, dry place.
Recharge to storage level every two to three months. Never store a pack completely empty or fully charged for long periods.
Can I use a 42V charger on a 48V hoverboard?
No. A 42V charger cannot fully charge a 48V pack, which needs 54.6V output. Using the wrong charger causes chronic undercharging and premature failure.
Always match charger output to your pack’s full-charge voltage. Check the label before plugging in.
Why does my hoverboard show full charge but won’t move?
Normal resting voltage with no output usually means the BMS has entered protection mode or a fuse has blown. The pack itself may still be healthy.
Try resetting the BMS by disconnecting and reconnecting the battery. Inspect the fuse and connectors if the problem persists.