
Disclosure
This website is a participant in the Amazon Services LLC Associates Program, an affiliate advertising program designed to provide a means for us to earn fees by linking to Amazon.com and affiliated sites.
Checking your camper van leisure battery charge status by voltage is the fastest way to know your remaining power. This complete guide reveals exact voltage readings for every charge level, so you never guess again.
You’ll learn a simple voltage chart, resting vs. loaded readings, and expert tips for accurate testing. Read on to protect your battery and keep your adventures powered.
Key Takeaways
- 12.7V equals 100% charged; 12.0V means roughly 50% remaining.
- Read voltage after 2+ hours resting, never while charging.
- Below 11.8V risks permanent damage to lead-acid batteries.
- Lithium (LiFePO4) holds 13.0V+ at full charge.
- Voltage alone misleads under load; confirm with a shunt monitor.
Best Voltage Monitors for Camper Van Leisure Battery Charge Status
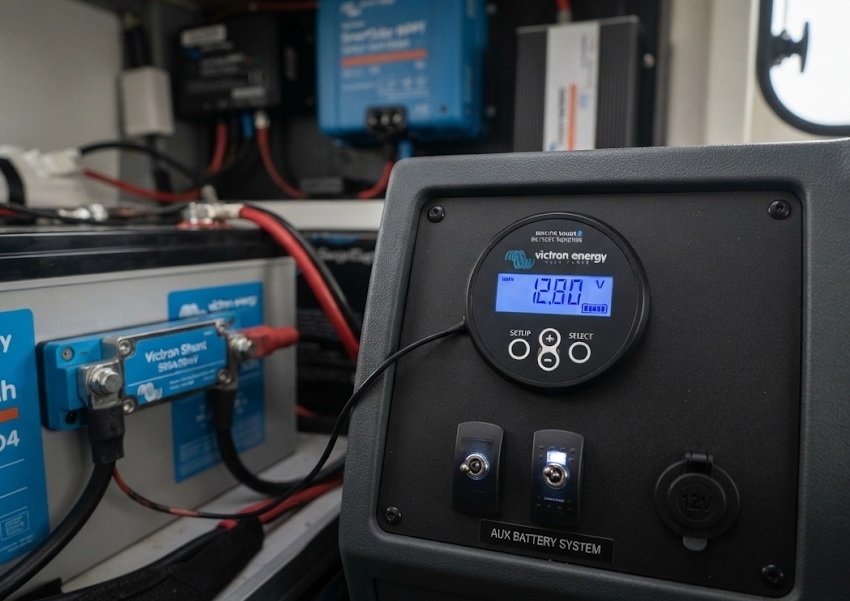
Victron Energy BMV-712 Smart Battery Monitor – Best Overall Choice
The Victron BMV-712 is the most recommended battery monitor for camper van electrical systems. It tracks voltage, current, and state of charge with ±0.4% accuracy, plus Bluetooth for smartphone monitoring. Ideal for anyone who wants precise, real-time leisure battery data beyond basic voltage readings.
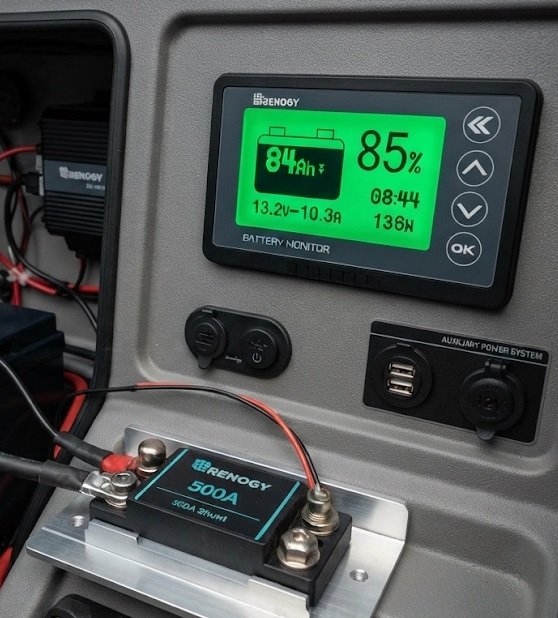
Renogy 500A Battery Monitor with Shunt – Best Budget Option
The Renogy 500A delivers reliable state-of-charge tracking at a fraction of premium prices. Its high-precision shunt measures current up to 500A, perfect for combined leisure and starter battery setups. A solid best option for budget-conscious van lifers wanting accurate voltage and amp-hour data.
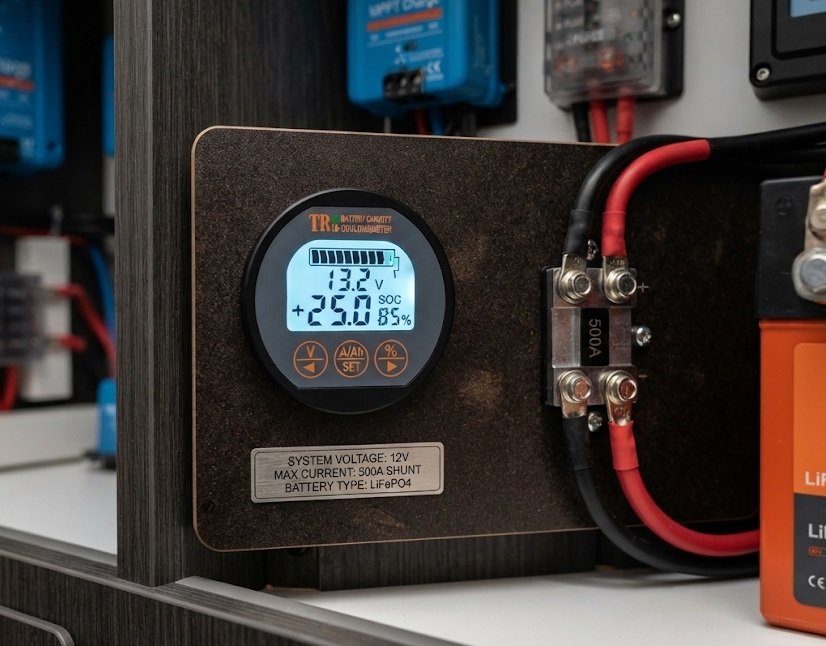
AiLi Voltmeter Ammeter Voltage Current Meter – Best Simple Voltage Display
The AiLi Voltmeter Ammeter offers a straightforward, no-frills voltage readout for quick charge checks. Its dual LED display shows voltage and current simultaneously, ideal for simple 12V systems. This affordable unit suits campers who only need basic voltage monitoring without complex setup.
How to Read Leisure Battery Voltage for Accurate Charge Status
Voltage is the easiest indicator of your leisure battery’s charge level. But readings only make sense under the right conditions. Follow these methods to get trustworthy numbers every time.
Resting Voltage: The Gold Standard for Charge Checks
A resting reading means the battery has sat unused for at least 2 hours. This eliminates surface charge and gives a true state-of-charge value.
- Step 1: Disconnect all loads and chargers.
- Step 2: Wait 2-4 hours (overnight is best).
- Step 3: Measure at the terminals with a digital multimeter.
Loaded vs. Unloaded Voltage Explained
Voltage sags when appliances draw power. A fridge running may pull your reading down by 0.3-0.5V, which is normal and not a sign of a flat battery.
| Condition | Typical Reading | Meaning |
|---|---|---|
| Resting, full | 12.7V | 100% charged |
| Resting, half | 12.0V | 50% charged |
| Under load | 11.9V | Often still healthy |
Why Temperature and Battery Type Matter
Cold weather lowers voltage readings, while lithium batteries hold higher voltages than lead-acid at every charge level. Always match your chart to your battery chemistry.
Quick Tip
- Always test after resting, never during charging.
- Compare readings to your battery type’s specific chart.
With these methods mastered, you can now match your readings to the lookup charts below.
Leisure Battery Voltage Chart: Charge Status Lookup Tables
Use these lookup tables to convert any resting voltage reading into a charge percentage. Match the chart to your battery chemistry for accurate results.
Lead-Acid and AGM Battery Voltage Chart
Flooded and AGM batteries share similar voltage-to-charge ratios. Readings below 50% shorten battery life significantly.
| Voltage (Resting) | Charge Status |
|---|---|
| 12.7V – 12.8V | 100% |
| 12.5V | 75% |
| 12.2V | 50% |
| 12.0V | 25% |
| 11.8V or lower | 0% – Damaged |
Lithium (LiFePO4) Battery Voltage Chart
Lithium batteries hold voltage higher and flatter across their charge range. This makes voltage a less reliable indicator, but the table below still helps.
| Voltage (Resting) | Charge Status |
|---|---|
| 13.4V – 13.6V | 100% |
| 13.2V | 75% |
| 13.0V | 50% |
| 12.8V | 25% |
| 12.0V or lower | 0% |
What Voltage Is Too Low for a Leisure Battery?
For lead-acid, 11.8V signals a critically discharged battery. Dropping below this causes sulfation and permanent capacity loss.
- Lead-acid: Never discharge below 12.0V (50%) for longevity.
- Lithium: Safe to 12.0V, but avoid regular deep discharge.
- AGM: Same limits as flooded; recovery is harder once damaged.
Key Takeaway
- 50% discharge (12.0V lead-acid) is the practical floor for battery health.
Now that you can read the charts, let’s cover the common mistakes that distort voltage readings.
Common Mistakes When Checking Camper Van Battery Charge by Voltage
Even accurate charts fail if your testing method is flawed. Avoid these frequent errors to get reliable charge readings every time.
Testing Too Soon After Charging or Discharging
Surface charge inflates readings right after charging. A battery fresh off a charger may show 13.2V but settle to 12.7V after resting.
- After charging: Wait 2-4 hours before testing.
- After heavy use: Let the battery recover 30+ minutes.
- Overnight test: The most accurate method available.
Ignoring Voltage Sag Under Load
Running a fridge, inverter, or heater pulls voltage down temporarily. A reading of 11.9V under a 10A load may still mean 70% charge.
Always note whether appliances were running during your test. Unloaded readings are the only ones worth comparing to a chart.
Using the Wrong Chart for Your Battery Type
Lithium and lead-acid batteries follow completely different voltage curves. Applying a lead-acid chart to LiFePO4 gives dangerously wrong conclusions.
| Mistake | Effect | Fix |
|---|---|---|
| Testing during charging | False high reading | Wait 2-4 hours |
| Testing under load | False low reading | Disconnect loads first |
| Wrong chemistry chart | Wrong charge estimate | Match chart to battery type |
Relying on Voltage Alone for Lithium Batteries
LiFePO4 voltage stays flat between 20% and 90% charge. Voltage cannot reveal mid-range capacity, so a shunt monitor is essential.
Key Takeaway
- Rest, unload, and match your chart — three rules for accurate readings.
Next, let’s look at how to extend battery life using what your voltage readings reveal.
Extending Leisure Battery Life Using Voltage Monitoring
Your voltage readings are more than a charge gauge — they’re a maintenance tool. Consistent monitoring reveals battery health trends before problems become expensive.
Staying Above the 50% Discharge Threshold
Lead-acid batteries last roughly twice as long when rarely discharged below 12.0V. Treat 50% as your daily floor, not your emergency limit.
- Recharge at 12.2V rather than waiting for 11.8V.
- Avoid deep cycles during cold weather when capacity drops.
- Top up with solar whenever the van sits parked.
Spotting Early Signs of Battery Degradation
Aging batteries lose capacity, so they hit low voltages sooner under identical loads. Track how quickly voltage drops overnight with no appliances running.
| Observation | Likely Cause | Action |
|---|---|---|
| Faster voltage drop than usual | Capacity loss | Load test the battery |
| Won’t hold above 12.4V | Sulfation | Try equalizing charge |
| Reads 10.5V under load | Failing cell | Replace battery |
Pairing Voltage Checks with a Battery Monitor
Voltage shows the surface; a shunt monitor shows the full picture. Together they deliver precise state-of-charge tracking and early fault detection.
Follow this simple routine for maximum battery lifespan:
- Check resting voltage weekly.
- Recharge at 12.2V (lead-acid) or 13.0V (lithium).
- Log readings monthly to spot trends.
Key Takeaway
- Recharging at 50% doubles lead-acid battery lifespan.
With monitoring habits in place, you can now choose the right tools to automate the process.
Tools and Techniques for Accurate Leisure Battery Voltage Testing
Reliable readings start with the right equipment and method. A basic multimeter works, but dedicated monitors make daily checks effortless.
Choosing a Digital Multimeter or Battery Monitor
A quality digital multimeter is the minimum requirement for voltage testing. For continuous tracking, install a shunt-based monitor instead.
- Digital multimeter: Cheap, portable, ideal for spot checks.
- Shunt battery monitor: Tracks state of charge continuously.
- Bluetooth monitors: Send readings straight to your phone.
Step-by-Step Voltage Testing Procedure
Follow these steps for a dependable resting voltage reading every time:
- Switch off all loads and chargers.
- Wait at least 2 hours for the battery to settle.
- Set your multimeter to DC voltage (20V range).
- Touch the red probe to positive, black to negative.
- Record the reading and compare it to your chart.
Where to Measure for the Most Accurate Reading
Measure directly at the battery terminals, not at a distribution panel. Wiring resistance and poor connections can drop voltage by 0.2V or more.
| Tool | Best For | Typical Cost |
|---|---|---|
| Digital multimeter | Occasional spot checks | $15-$40 |
| Shunt monitor | Continuous tracking | $40-$200 |
| Bluetooth monitor | Remote smartphone alerts | $80-$250 |
Key Takeaway
- Measure at the terminals after a 2-hour rest for accurate results.
Now you have the tools and technique — let’s put it all together with a practical daily routine.
Real-World Voltage Scenarios for Camper Van Battery Management
Understanding numbers on a chart is one thing — applying them on the road is another. These practical scenarios show how voltage readings guide daily decisions.
Overnight Parking Without Hookup
Running a fridge and lights overnight drains roughly 20-30% of a 100Ah battery. Check resting voltage each morning before solar or driving recharges it.
- 12.4V morning reading: Healthy, continue as normal.
- 12.1V morning reading: Recharge soon via solar or alternator.
- 11.9V morning reading: Reduce loads immediately.
Solar Charging and Voltage Recovery
Solar panels push voltage above 13V during charging, which is normal. Only resting readings after sunset reveal the true state of charge.
On cloudy days, expect slower recovery and plan power use accordingly.
Winter Camping Voltage Behavior
Cold temperatures reduce usable capacity by up to 20% in lead-acid batteries. Voltage sag appears earlier, so adjust your discharge floor to 12.3V in freezing conditions.
| Scenario | Reading | Recommended Action |
|---|---|---|
| Morning, no solar | 12.1V | Recharge within hours |
| Solar charging | 13.5V | Normal, ignore |
| Winter, under load | 11.9V | Reduce consumption |
Key Takeaway
- Adjust your discharge floor to 12.3V in freezing conditions.
These scenarios show why combining voltage checks with smart habits keeps your power reliable on every trip.
Charging Methods and Their Voltage Signatures
Every charging source produces a distinct voltage pattern. Recognizing these signatures helps you confirm your leisure battery is charging correctly.
Solar, Alternator, and Mains Charging Compared
Each method delivers different voltage levels and charging speeds. Match your expectations to the source you’re using.
| Source | Charging Voltage | Best For |
|---|---|---|
| Solar panels | 13.5V – 14.4V | Off-grid topping up |
| Alternator (DC-DC) | 14.2V – 14.6V | Fast driving recharge |
| Mains charger | 13.8V – 14.7V | Hookup or storage |
Understanding Bulk, Absorption, and Float Stages
Smart chargers move through three stages, each with its own voltage target. Knowing these stages prevents false alarms about “overcharging.”
- Bulk stage: Full current until voltage hits 14.4V.
- Absorption stage: Holds 14.4V while current tapers.
- Float stage: Drops to 13.6V to maintain full charge.
When Charging Voltage Looks Wrong
If voltage never exceeds 13.0V while charging, your battery is barely receiving current. Check wiring, fuses, and charger settings immediately.
Low charging voltage often points to voltage drop across undersized cables — a common camper van issue.
Key Takeaway
- Charging below 13.0V signals a wiring or charger fault worth investigating.
With charging behavior understood, you can now troubleshoot common voltage problems confidently.
Conclusion: Master Your Camper Van Leisure Battery Charge Status by Voltage
Reading your camper van leisure battery charge status by voltage is simple once you know the charts. Rest the battery, match your chemistry, and interpret readings correctly.
Recharge at 12.2V for lead-acid and 13.0V for lithium to protect longevity. Pair voltage checks with a shunt monitor for complete accuracy.
Grab your multimeter today and test your battery before your next trip.
With these habits, you’ll always know your power — and never get caught flat.
Frequently Asked Questions about Camper Van Leisure Battery Charge Status by Voltage
What voltage is a fully charged camper van leisure battery?
A fully charged lead-acid or AGM leisure battery reads 12.7V to 12.8V at rest. Lithium (LiFePO4) batteries hold 13.4V to 13.6V when full.
Always measure after a 2-hour rest. Readings taken during charging or under load will mislead you.
How do I check my leisure battery charge without a monitor?
Use a digital multimeter set to DC volts. Disconnect all loads and chargers, then wait two hours before testing at the terminals.
Compare your reading to a voltage chart for your battery chemistry. This free method delivers reliable results for occasional checks.
What voltage is 50% on a leisure battery?
For lead-acid and AGM batteries, 12.0V resting equals roughly 50% charge. This is the practical floor for protecting battery lifespan.
Lithium batteries reach 50% around 13.0V. Discharging below these levels regularly causes permanent capacity loss.
Why does my leisure battery voltage drop so fast?
Fast voltage drops usually indicate capacity loss from age or sulfation. Cold weather and heavy loads also accelerate the decline.
Test with no appliances running to confirm. If voltage still falls quickly, have the battery load-tested or replace it.
Is 12.2V enough to start a camper van?
12.2V represents about 50% charge and may still start a vehicle. However, repeated low-voltage starts strain both battery and alternator.
Recharge promptly at 12.2V. Never rely on a leisure battery for starting — keep a separate starter battery.
What is the best way to monitor leisure battery charge status?
A shunt-based battery monitor is the most accurate method. It tracks current in and out, displaying true state of charge continuously.
Combine it with periodic voltage checks for a complete picture. Bluetooth models let you monitor from your phone.
Can I check battery voltage while it is charging?
You can, but readings will show charging voltage, not charge level. Expect 13.5V to 14.6V depending on your charger stage.
Wait at least 2 hours after charging stops. Only resting voltage reveals the true state of charge.
How often should I check my leisure battery voltage?
Check resting voltage weekly during regular use. Daily checks help during off-grid trips with heavy consumption.
Log readings monthly to spot degradation trends early. Consistent monitoring extends battery life and prevents surprise failures.