
Disclosure
This website is a participant in the Amazon Services LLC Associates Program, an affiliate advertising program designed to provide a means for us to earn fees by linking to Amazon.com and affiliated sites.
If your electric scooter battery won’t charge, the culprit is usually a faulty charger, blown fuse, loose connection, or degraded battery cells. Diagnosing the issue fast saves you money on unnecessary replacements.
This complete guide walks you through expert tips and proven methods to test every component safely at home. Keep reading to pinpoint the exact fault and get your ride rolling again.
Key Takeaways
- Test the charger first with a multimeter—it causes roughly half of all charging failures.
- Check the fuse and charging port for burns, corrosion, or loose pins before blaming the battery.
- Resting voltage below 20V on a 36V pack often means the battery needs professional revival.
- Never charge a swollen or heat-damaged battery—replace it immediately for safety.
- Storing batteries at 50–80% charge prevents the deep discharge that kills most scooters.
Best Chargers and Battery Tools for an Electric Scooter That Won’t Charge
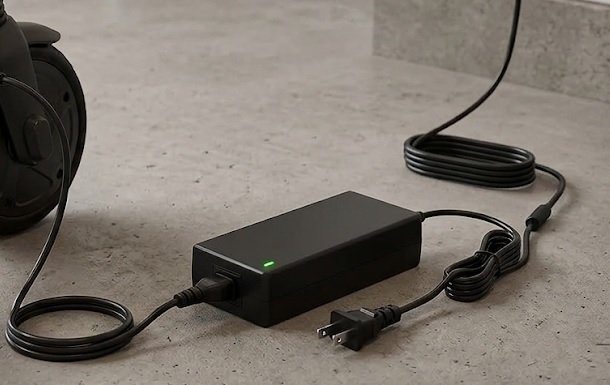
Segway Ninebot 42V 2A Charger (Model NBW42D) – Best Overall Choice
The Segway Ninebot NBW42D is a reliable 42V 2A replacement charger recommended for 36V scooter packs. It features overcharge and short-circuit protection, an LED status indicator, and a standard 3-pin connector. This is the best option for riders who confirmed their original charger died and want a safe, certified replacement.
HTRC B6 V2 Smart Balance Charger – Best Diagnostic Tool
The HTRC B6 V2 is ideal for testing and reviving individual battery cells. It offers adjustable charge rates, voltage readouts, and balance charging for lithium packs. Use it to diagnose whether your scooter battery is recoverable or truly dead before spending money on a full replacement pack.

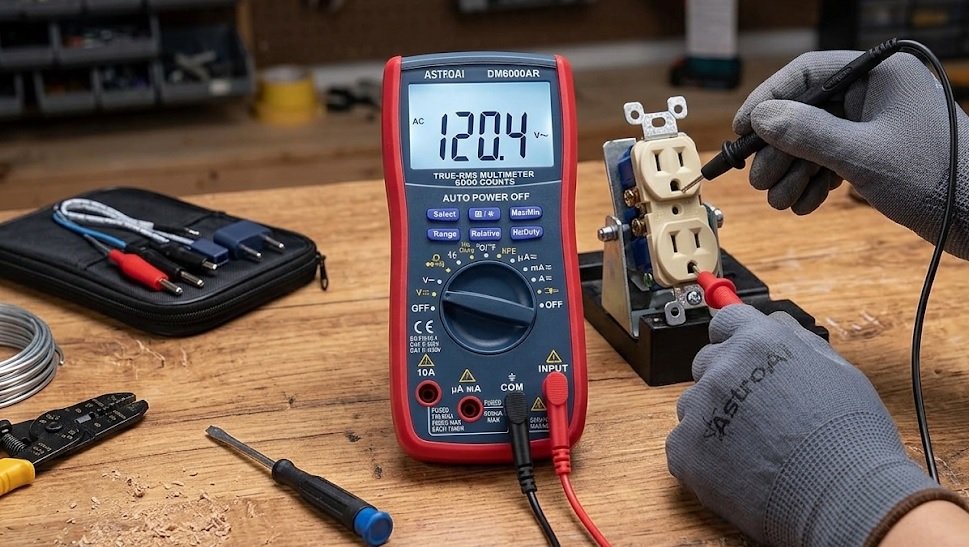
VicTsing Digital Multimeter (Model MS8233D) – Best Budget Tester
The VicTsing MS8233D digital multimeter is the affordable tool every scooter owner should keep on hand. It measures DC voltage, continuity, and resistance, letting you test chargers, fuses, and battery output in minutes. This is the best option for beginners diagnosing charging faults at home.
How to Diagnose Why Your Electric Scooter Battery Won’t Charge
Before replacing anything, work through the system in order: charger, port, fuse, wiring, then battery. This proven sequence isolates the fault in under 30 minutes.
Step 1: Test the Charger Output
Plug the charger into a wall outlet without connecting it to the scooter. Set your multimeter to DC voltage and probe the output connector.
- Correct reading: Voltage within 1–2V of the charger’s rating (e.g., 42V for a 36V scooter)
- Zero or fluctuating reading: The charger has failed and needs replacement
- No LED light: Check the wall outlet and charger cable for damage first
Step 2: Inspect the Charging Port and Fuse
A bent pin, corrosion, or debris inside the charging port blocks current flow. Shine a flashlight inside and look for burn marks or discoloration.
Next, locate the inline fuse—usually near the battery or controller. A blown fuse reads infinite resistance on a continuity test.
Step 3: Measure Battery Voltage
Disconnect the battery and measure its resting voltage at the main terminals. Compare results against this table:
| Battery Type | Healthy Voltage | Needs Revival |
|---|---|---|
| 24V pack | 25–29V | Below 20V |
| 36V pack | 38–42V | Below 30V |
| 48V pack | 50–54V | Below 40V |
Quick Tip: If the charger tests fine and the fuse is intact, the fault almost always lies in the battery or its BMS.
Once you’ve identified the failing component, move on to the repair or replacement steps below.
How to Fix Common Electric Scooter Charging Problems
Once you’ve isolated the faulty component, most charging issues have a straightforward fix. Here’s how to handle each scenario safely.
Replacing a Faulty Charger or Blown Fuse
Match the replacement charger to your scooter’s exact voltage and connector type—never use a higher-voltage unit.
- Charger swap: Buy an OEM or certified equivalent with matching output (e.g., 42V 2A for 36V scooters)
- Fuse replacement: Use the same amperage rating; a higher-rated fuse risks fire damage
- Port repair: Clean corrosion with contact cleaner or replace the charging port assembly entirely
Reviving a Deeply Discharged Battery
A battery that reads below its revival threshold needs a trickle charge, not a standard one. Many smart chargers refuse to start on deeply drained packs.
- Connect a low-amp charger (0.5–1A) and monitor voltage every 30 minutes
- Once voltage climbs above the cutoff, switch to the standard charger
- If voltage won’t rise after 2–3 hours, the cells are permanently damaged
When to Replace the Battery Instead
Some failures can’t be repaired safely. Replace the pack immediately if you notice these warning signs:
- Swelling or bulging of the battery casing
- Burn smell or visible scorch marks near terminals
- Voltage collapse under light load despite full charge
Safety First: Never open a lithium battery pack unless you’re trained—punctured cells can ignite violently.
With the fault fixed, focus on prevention to avoid repeating the same problem.
Preventing Future Electric Scooter Battery Charging Failures
Most charging failures are preventable with proper habits. These maintenance practices extend battery life and keep your scooter ready to ride.
Best Charging Habits for Longer Battery Life
Lithium batteries degrade fastest when kept at extremes—full charge or complete drain. Aim for the middle range during daily use.
- Charge to 80–90% for regular rides; save 100% for long trips
- Never drain below 20% to avoid deep-discharge damage
- Unplug after charging completes—don’t leave it overnight routinely
- Charge at room temperature, never in freezing cold or direct sun
Proper Storage to Avoid Dead Batteries
Storage is where most scooters silently die. A pack left at 0% for months may never recover.
- Charge the battery to 50–80% before storing
- Store in a cool, dry place between 15–25°C (59–77°F)
- Recharge to 50–80% every 2–3 months
- Disconnect the battery from the scooter if storing long-term
Routine Checks That Catch Problems Early
Spend five minutes monthly inspecting key components. Small issues caught early prevent expensive replacements.
- Inspect the charging port for debris, bent pins, or corrosion
- Check charger cables for fraying or exposed wires
- Monitor charge time—a sudden increase signals degrading cells
- Feel for unusual heat during charging, which indicates resistance
Remember: Consistent moderate charging beats occasional full cycles for battery longevity.
Combined with the diagnostic steps above, these habits keep your scooter charging reliably for years.
When to Repair vs. Replace Your Electric Scooter Battery
Not every charging failure means a new battery. Understanding the difference between repairable faults and terminal damage saves hundreds of dollars.
Signs Your Battery Is Still Repairable
Many packs fail due to a single weak cell or faulty BMS rather than total degradation. These issues are often fixable by a technician.
- Voltage reads close to normal but drops quickly under load
- Charger works and the fuse is intact
- No swelling, heat, or burn smell present
- Battery is under 2 years old with moderate use
Signs You Need a Full Replacement
Certain failures present serious safety risks and cannot be reversed. Replace the pack immediately if you observe any of these:
- Physical swelling or deformed casing
- Cells won’t hold charge beyond a few minutes
- Battery is over 3–4 years old with heavy cycling
- Water damage or corrosion inside the pack
Cost Comparison: Repair vs. Replace
Weigh the numbers before deciding. A technician repair often costs far less than a new pack.
| Option | Typical Cost | Best For |
|---|---|---|
| BMS replacement | $40–$80 | Charging cutoff faults |
| Cell replacement | $80–$150 | One or two weak cells |
| New battery pack | $150–$500+ | Swollen or aged packs |
Rule of Thumb: If repair costs exceed 60% of a new pack, replacement is the smarter choice.
Weighing these factors helps you make a safe, cost-effective decision for your scooter.
Safety Risks of Charging a Damaged Electric Scooter Battery
A battery that won’t charge may be warning you of a serious hazard. Ignoring these signals risks fire, injury, or property damage.
Warning Signs You Should Never Ignore
Lithium battery failures escalate quickly. Stop charging immediately if you notice any of these red flags:
- Hissing, popping, or crackling sounds during charging
- Swollen or bulging battery casing
- Sweet or chemical odors near the battery
- Excessive heat that persists after unplugging
- Smoke or sparks from the port or pack
What to Do in a Battery Emergency
Act fast and prioritize safety over saving the scooter. Follow these steps in order:
- Unplug the charger from the wall first, then the scooter
- Move the scooter to a well-ventilated area away from flammables
- Do not touch a hot or swelling battery with bare hands
- Call emergency services if smoke or fire appears
- Let professionals handle disposal—never trash a damaged pack
Safe Charging Practices at Home
Reduce risk by charging responsibly every time. Small habits make a big difference in fire prevention.
- Charge on a hard, non-flammable surface like concrete or tile
- Never charge unattended overnight or while sleeping
- Use only the original or certified charger for your model
- Keep a Class D fire extinguisher nearby for lithium fires
Critical: Water makes lithium battery fires worse—never use water to extinguish one.
Treating every warning sign seriously protects you and your home from preventable disasters.
Frequently Asked Questions About Electric Scooter Charging
Riders often face the same confusing scenarios. These quick answers address the most common charging questions directly.
Why Does My Charger Show Green Immediately?
A green light within seconds usually means the charger isn’t detecting the battery. Common causes include:
- Blown fuse between the port and battery
- Loose or disconnected battery terminal
- Faulty BMS blocking charge current
- Dead charger delivering no output voltage
Can I Charge My Scooter With a Different Charger?
Only if the voltage and connector match exactly. A higher-voltage charger can overheat cells and cause fire.
- Match voltage precisely (36V scooter needs a 42V output charger)
- Equal or lower amperage is safe; higher amps stress the battery
- Confirm polarity and plug type before connecting
How Long Should a Scooter Battery Take to Charge?
Typical charge times range from 3 to 8 hours depending on capacity and charger output.
| Battery Capacity | 2A Charger | 4A Charger |
|---|---|---|
| 7.8Ah (36V) | 4–5 hours | 2–3 hours |
| 10Ah (36V) | 5–6 hours | 3–4 hours |
| 15Ah (48V) | 7–8 hours | 4–5 hours |
Note: Charge times far exceeding these ranges suggest a weak charger or degrading battery.
Understanding these basics helps you spot problems before they worsen.
Tools and Equipment for Testing Electric Scooter Batteries
Having the right tools turns a frustrating diagnosis into a quick 15-minute job. These essentials cover nearly every charging fault you’ll encounter.
Must-Have Diagnostic Tools
Start with the basics before investing in specialized equipment. These four tools handle most repairs.
- Digital multimeter: Measures voltage, continuity, and resistance for chargers, fuses, and packs
- Battery load tester: Reveals how voltage holds under real-world draw
- Smart balance charger: Revives individual cells and diagnoses pack health
- Contact cleaner: Removes corrosion from ports and terminals safely
Optional Upgrades for Serious DIYers
If you repair scooters regularly, these tools pay for themselves quickly.
- Battery capacity tester: Confirms actual Ah rating versus claimed specs
- Infrared thermometer: Spots overheating cells before they fail
- Spot welder: Rebuilds battery packs with new cells safely
- BMS diagnostic tool: Reads fault codes from smart battery management systems
Where to Buy and What to Spend
Budget varies by how deep you plan to diagnose. Here’s a realistic cost breakdown:
| Tool | Price Range | Priority |
|---|---|---|
| Digital multimeter | $15–$40 | Essential |
| Smart balance charger | $40–$80 | Essential |
| Load tester | $30–$70 | Recommended |
| Spot welder | $60–$150 | Advanced only |
Start Simple: A $20 multimeter and a smart charger solve 90% of charging problems.
Equipped with these tools, you can confidently tackle any charging issue yourself.
Conclusion: Fixing an Electric Scooter Battery That Won’t Charge
Diagnosing why your electric scooter battery won’t charge starts with testing the charger, fuse, port, and voltage in order. Most faults are simple, affordable fixes.
Remember the key rule: safety always comes first. Never charge a swollen or heat-damaged pack—replace it immediately.
Grab a multimeter and run through these tests today. You’ll likely save money and get back on the road fast.
With the right tools and habits, your scooter stays charged and reliable for years.
Frequently Asked Questions About Electric Scooter Battery Charging Issues
Why won’t my electric scooter battery charge even with a new charger?
If a new charger doesn’t work, the fault lies in the scooter itself—usually a blown fuse, faulty BMS, or disconnected wiring. Test the charging port and fuse for continuity next.
Deeply discharged cells below the revival threshold also block charging. Measure resting voltage; if it’s far below normal, the battery may need professional revival or replacement.
How do I know if my scooter battery is completely dead?
A battery reading near zero volts or failing to hold charge after a trickle charge is likely dead. Swelling, burn smells, or voltage collapse under load confirm terminal damage.
Healthy packs hold voltage for days when disconnected. If yours drops rapidly while sitting unused, internal cell degradation has occurred and replacement is the safest option.
Can I revive a fully discharged electric scooter battery?
Sometimes, yes. Connect a low-amp charger (0.5–1A) and monitor voltage every 30 minutes. Once it climbs above the cutoff threshold, switch to your standard charger.
If voltage refuses to rise after 2–3 hours, the cells are permanently damaged. Never force-charge a battery that shows swelling or excessive heat during revival attempts.
What is the best way to store an electric scooter battery long-term?
Charge the pack to 50–80%, then store it in a cool, dry place between 15–25°C. Disconnect it from the scooter to prevent parasitic drain.
Recharge to 50–80% every two to three months. This prevents deep discharge, which is the leading cause of batteries that won’t charge after winter storage.
How long does an electric scooter battery normally last?
Most lithium packs last 2–4 years or 300–500 full charge cycles. Capacity gradually declines with each cycle until range becomes impractical.
Proper charging habits—avoiding full drains and extreme temperatures—can extend lifespan significantly. Replace the battery once range drops below 60% of original.
Is it safe to leave my scooter charging overnight?
Generally no. Overnight charging increases fire risk if the BMS fails or cells overheat. Charge during the day when you can monitor progress.
Modern smart chargers reduce risk, but unattended charging remains the leading cause of scooter battery fires. Unplug once the indicator shows full.
Why does my charger get hot while charging?
Mild warmth is normal, but excessive heat signals a problem. A failing charger, blocked ventilation, or high-resistance connection all cause overheating.
Unplug immediately if the charger becomes too hot to touch. Replace it with a certified unit matching your scooter’s exact voltage and connector specifications.
Can I use any charger that fits my scooter’s port?
No—matching the plug doesn’t guarantee matching voltage. Using the wrong charger can overcharge cells, damage the BMS, or cause a fire.
Always verify the output voltage and polarity match your original charger. When in doubt, buy an OEM replacement specific to your scooter model.