
Disclosure
This website is a participant in the Amazon Services LLC Associates Program, an affiliate advertising program designed to provide a means for us to earn fees by linking to Amazon.com and affiliated sites.
This voltage cheat sheet for RV and camper batteries gives you exact state-of-charge readings at a glance. Stop guessing whether your battery is full, half empty, or dangerously low.
You’ll learn 12V, 6V, and lithium voltage charts, plus expert tips on resting voltage and load testing. Read on to keep your adventures powered up.
Key Takeaways
- 12.7V means a 12V battery is fully charged; 12.0V is roughly 50%.
- Read voltage after 2–4 resting hours for accurate results.
- Lithium (LiFePO4) holds 13.2V–13.4V across most of its charge.
- Below 11.8V, lead-acid batteries risk permanent damage.
- Test under load to catch weak batteries voltage alone misses.
Best Voltage Monitors and Testers for RV and Camper Batteries – Detailed Comparison
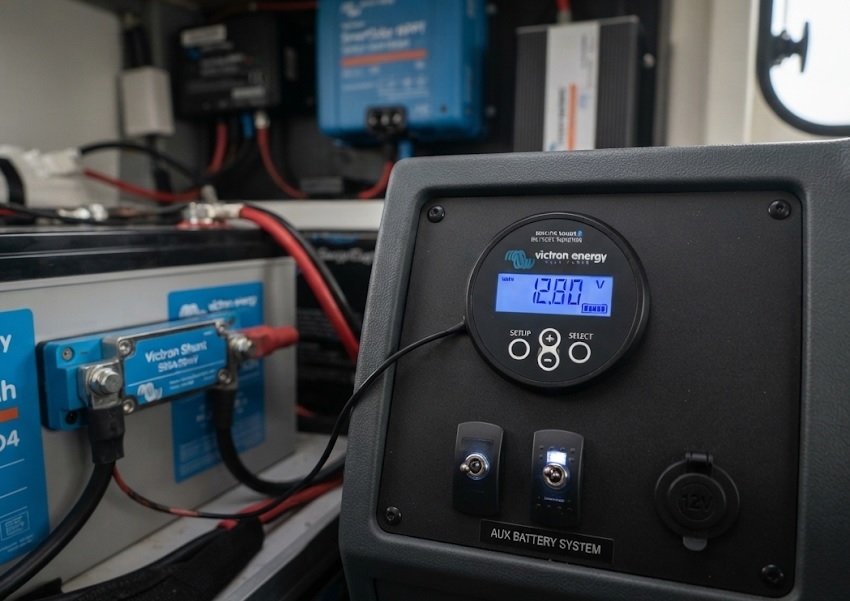
Victron BMV-712 Smart Battery Monitor – Best Overall Choice
The Victron BMV-712 is widely recommended for serious RVers who want precise state-of-charge data. It tracks voltage, current, and amp-hours with ±0.4% accuracy. Bluetooth lets you check readings from your phone. Ideal for lithium and lead-acid setups needing reliable, real-time monitoring.
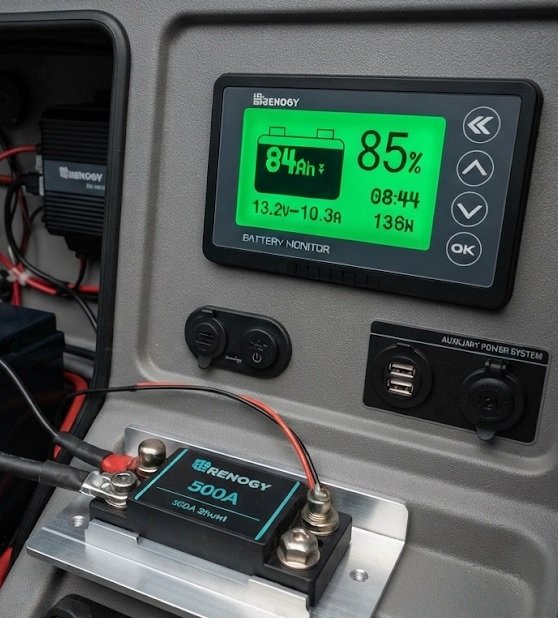
Renogy 500A Battery Monitor with Shunt – Best Budget Option
The Renogy 500A delivers solid performance at a fraction of premium prices. It measures voltage, current, power, and remaining capacity on a clear LCD screen. This is the best option for campers wanting accurate data without spending big. Works with 12V, 24V, and 48V systems.
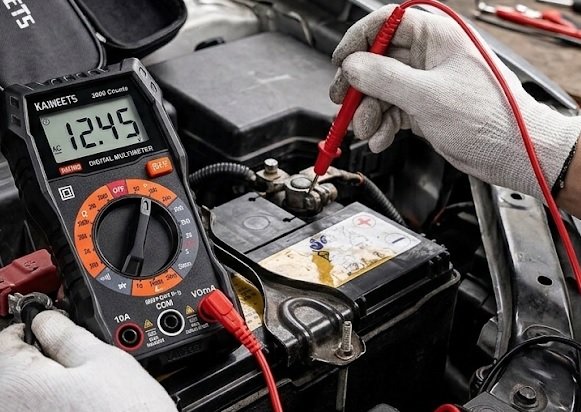
KAIWEETS KM100 Digital Multimeter – Best Portable Tester
The KAIWEETS KM100 is ideal for quick voltage spot-checks at the campsite. It reads DC voltage up to 600V with 0.5% accuracy and includes continuity and resistance testing. Compact, affordable, and perfect for verifying battery health before any trip.
12V Battery Voltage Chart: What Every Reading Means
A 12V battery voltage chart translates resting voltage into state of charge. These readings apply to flooded, AGM, and gel lead-acid batteries. Always measure after the battery rests, not while charging.
12V Lead-Acid State of Charge Readings
Use this table to interpret your multimeter or monitor readings instantly.
| Voltage | State of Charge |
|---|---|
| 12.7V+ | 100% |
| 12.4V | 75% |
| 12.2V | 50% |
| 12.0V | 25% |
| 11.8V | 0% (damage risk) |
Why Resting Voltage Matters
Surface charge inflates readings right after charging. Let batteries rest 2–4 hours before testing. Otherwise, your chart numbers will mislead you.
- Charging voltages: 13.6V–14.4V is normal
- Float charge: 13.2V–13.4V maintains full charge
- Under load: Expect a 0.5V–1V drop
6V and 12V Golf Cart Batteries
Many campers wire two 6V batteries in series for 12V power. Each 6V battery reads 6.37V at 100% and 6.05V at 50%. Check each battery individually to spot weak cells.
Quick Reference
- 12.7V = full, 12.2V = half, 11.8V = empty
- Rest 2–4 hours before testing voltage
- 6V batteries: 6.37V full, 6.05V half
Lithium (LiFePO4) Battery Voltage Chart for RVs and Campers
Lithium RV batteries hold voltage far more steadily than lead-acid. That flat discharge curve makes voltage-only testing less reliable. You need a shunt-based monitor for accurate lithium state of charge.
LiFePO4 Voltage Readings Explained
Use this chart as a rough guide for 12V lithium camper batteries.
| Voltage | State of Charge |
|---|---|
| 13.6V+ | 100% (resting) |
| 13.3V | ~99% |
| 13.2V | ~90% |
| 13.0V | ~70% |
| 12.8V | ~30% |
| 12.0V | ~10% (recharge now) |
Why Voltage Alone Fails with Lithium
Notice how 13.2V covers anything from 70% to 90%. Voltage barely moves across the middle of the curve. Relying on a voltmeter alone will leave you guessing.
- Best option: Shunt-based monitor tracking amp-hours
- Good backup: Battery management system (BMS) app
- Avoid: Voltage-only gauges for lithium banks
Charging Voltages for LiFePO4
Lithium chargers run higher than lead-acid profiles. Bulk and absorption stages typically sit between 14.2V and 14.6V. Float charge should stay near 13.4V–13.6V to avoid stressing cells.
Quick Reference
- LiFePO4 rests at 13.2V–13.6V when full
- Voltage stays flat mid-curve, so use a shunt monitor
- Charge between 14.2V and 14.6V; float at 13.4V–13.6V
How to Test RV and Camper Battery Voltage Correctly
Accurate readings require the right technique. Follow these proven methods to get trustworthy numbers every time.
Step-by-Step Voltage Testing Process
Use this numbered sequence for reliable results.
- Disconnect all loads and chargers from the battery.
- Wait 2–4 hours for surface charge to dissipate.
- Set your multimeter to DC voltage (20V range).
- Touch red to positive, black to negative terminals.
- Record the reading and compare it to your voltage chart.
Load Testing vs Resting Voltage
Resting voltage shows state of charge; load testing reveals battery health. A weak battery may read 12.6V at rest but collapse under load. Apply a 10–15 amp load and watch for a drop below 11.5V.
- Healthy battery: Holds above 11.8V under load
- Failing battery: Drops below 11.5V quickly
- Dead cell: Recovers slowly after load removed
Common Testing Mistakes to Avoid
Many RVers test while charging or immediately after. Both produce inflated readings that hide problems. Always test at the terminals, not through a corroded connection.
Quick Reference
- Disconnect loads and rest 2–4 hours before testing
- Load test at 10–15 amps to reveal weak batteries
- Never test during or right after charging
Battery Voltage Safety Thresholds: When to Recharge or Replace
Knowing your battery’s limits prevents costly damage and mid-trip failures. These thresholds tell you exactly when to act.
Critical Voltage Levels by Battery Type
Never discharge below these minimums to protect battery lifespan.
| Battery Type | Recharge At | Damage Below |
|---|---|---|
| Flooded Lead-Acid | 12.1V | 11.8V |
| AGM / Gel | 12.2V | 11.9V |
| LiFePO4 | 12.0V | 10.0V (BMS cutoff) |
Signs Your Battery Needs Replacement
Age and abuse eventually kill any battery. Watch for these warning signs before you get stranded.
- Won’t hold charge: Drops below 12.0V within hours
- Slow recovery: Takes days to reach full voltage
- Swollen case: Physical deformation means internal damage
- Age over 5 years: Lead-acid batteries degrade steadily
How Temperature Affects Voltage Readings
Cold weather lowers voltage readings by 0.1V–0.3V without reducing actual charge. Hot conditions accelerate self-discharge and water loss in flooded batteries. Adjust expectations seasonally.
Quick Reference
- Recharge lead-acid at 12.1V, lithium at 12.0V
- Replace batteries that won’t hold charge or show swelling
- Cold temps lower readings 0.1V–0.3V without losing charge
Charging Voltage Guide for RV and Camper Battery Banks
Correct charging voltages maximize battery life and performance. Wrong settings cause undercharging, sulfation, or cell damage over time.
Charger Voltage Settings by Battery Type
Match your charger profile to your battery chemistry for best results.
| Battery Type | Bulk/Absorption | Float |
|---|---|---|
| Flooded Lead-Acid | 14.4V–14.8V | 13.2V–13.4V |
| AGM | 14.2V–14.6V | 13.2V–13.4V |
| Gel | 14.0V–14.2V | 13.2V–13.4V |
| LiFePO4 | 14.2V–14.6V | 13.4V–13.6V |
Solar and Shore Power Charging Tips
Solar controllers and converters must match your battery profile. Many default to flooded settings that undercharge lithium banks.
- Set charge profile manually for your exact chemistry
- Use temperature compensation for lead-acid in cold climates
- Verify with a multimeter that absorption voltage is reached
Equalization for Flooded Batteries Only
Equalizing at 15.5V–16.2V reverses sulfation in flooded cells. Never equalize AGM, gel, or lithium batteries—it causes permanent damage. Perform equalization every 1–3 months based on usage.
Quick Reference
- Match charger profile to battery chemistry
- LiFePO4 charges at 14.2V–14.6V, floats at 13.4V–13.6V
- Only equalize flooded batteries, never sealed or lithium
Boondocking and Off-Grid Voltage Management Tips
Extended off-grid trips demand smarter voltage monitoring. Without shore power, every amp-hour counts toward keeping your camper running.
Daily Voltage Monitoring Routine
Check your battery bank at consistent times each day. Morning readings before solar production give the truest state-of-charge picture.
- Morning: Record resting voltage before any loads
- Midday: Confirm solar is reaching absorption voltage
- Evening: Check voltage after heavy appliance use
Managing Loads to Protect Voltage
High-draw appliances crash voltage fast. Run them strategically to preserve battery health.
- Microwave and coffee makers: Use during peak solar hours
- Furnace fans: Biggest overnight drain in cold weather
- Inverters: Turn off when not in use to stop idle draw
- 12V fridge: Expect 30–60 amp-hours daily
When to Run a Generator
Recharge when voltage hits 12.1V (lead-acid) or 12.0V (lithium). Running a generator to 80% is faster and cheaper than chasing a full charge. Solar finishes the job.
Quick Reference
- Check voltage morning, midday, and evening
- Run high-draw appliances during peak solar hours
- Recharge at 12.1V (lead-acid) or 12.0V (lithium)
Voltage Drop, Wiring, and Common Diagnostic Problems
Voltage at the battery isn’t always voltage at your appliances. Wiring resistance and bad connections steal power before it reaches your devices.
Understanding Voltage Drop in RV Systems
Long wire runs and thin gauges cause voltage drop. A 0.5V loss means your 12V fridge runs on 11.5V, forcing it to work harder.
- Keep runs short: Mount batteries close to high-draw loads
- Use thicker wire: 10 AWG or larger for main runs
- Limit total drop: Aim for under 3% (0.36V on 12V)
Diagnosing Strange Voltage Readings
Odd readings usually point to connection or component issues, not the battery itself.
| Symptom | Likely Cause |
|---|---|
| Voltage jumps around | Loose or corroded terminals |
| Reads high but dies fast | Surface charge masking weak battery |
| Different at battery vs outlet | Excessive voltage drop |
| Drops under any load | Bad cell or failing battery |
Corrosion and Connection Maintenance
Clean terminals every few months with a wire brush and baking soda solution. Apply dielectric grease to prevent future corrosion. Tight, clean connections deliver full voltage to your system.
Quick Reference
- Keep voltage drop under 3% with thick, short wiring
- Erratic readings usually mean bad connections
- Clean and grease terminals every few months
Conclusion: Your Complete Voltage Cheat Sheet for RV and Camper Batteries
This voltage cheat sheet for RV and camper batteries puts accurate readings at your fingertips. You now know the charts, testing methods, and safety thresholds that matter.
Bookmark these voltage charts and test your batteries regularly. Consistent monitoring prevents breakdowns and extends battery life.
Grab a quality multimeter or shunt monitor today. Start tracking your battery voltage this week.
Reliable power means worry-free adventures. You’re ready to camp with confidence.
Frequently Asked Questions About RV and Camper Battery Voltage
What voltage should a fully charged 12V RV battery read?
A fully charged 12V lead-acid battery reads 12.7V or higher at rest. This applies to flooded, AGM, and gel batteries after surface charge dissipates.
Lithium (LiFePO4) batteries rest higher at 13.2V–13.6V when fully charged. Always wait 2–4 hours after charging before testing.
How do I check my camper battery voltage without a multimeter?
Use a built-in battery monitor or shunt-based gauge if your camper has one. Many RVs include basic voltage displays on control panels.
Portable 12V voltage meters that plug into cigarette lighter sockets work as a quick alternative. For accurate readings, a digital multimeter remains the best option.
Why does my RV battery voltage drop so fast?
Fast voltage drops usually indicate a weak or aging battery. Parasitic loads like propane detectors and clocks also drain power slowly.
Test the battery under load to confirm health. If voltage falls below 11.8V quickly, replacement is likely needed.
Is 12.2V a good battery voltage?
12.2V represents roughly 50% state of charge for lead-acid batteries. It’s usable but should be recharged soon.
Repeated discharges to 50% shorten battery lifespan. For longest life, recharge at 12.4V (75% charge) whenever possible.
What is the best way to test RV battery health?
Combine resting voltage testing with a load test for complete results. Resting voltage shows charge level; load testing reveals actual capacity.
Apply a 10–15 amp load and watch voltage. A healthy battery holds above 11.8V; a failing one collapses quickly.
How does temperature affect RV battery voltage readings?
Cold temperatures lower voltage readings by 0.1V–0.3V without reducing actual charge. This is normal and not a sign of failure.
Hot weather accelerates self-discharge and water loss in flooded batteries. Check electrolyte levels more often during summer months.
Can I use a car battery charger on my camper battery?
Yes, if the charger matches your battery chemistry and voltage. Many modern chargers include selectable profiles for flooded, AGM, gel, and lithium.
Never use an old unregulated charger on lithium batteries. It can overcharge and damage cells. Always verify charging voltage settings first.
What voltage is too low for an RV battery?
Below 11.8V, lead-acid batteries risk permanent damage from sulfation. Recharge immediately if readings drop this low.
Lithium batteries have a BMS that cuts off around 10.0V. Avoid discharging either type below 20% capacity for best longevity.